Table of Contents
- How I Tested This Routine
- Step-by-Step: How to Shower
- Phase 1: Prep the Bathroom
- Phase 2: Set Up Equipment
- Phase 3: Getting Into the Shower
- Phase 4: Showering Safely
- Phase 5: Exiting Safely
- Safe Bathroom Setup Checklist
- Gear Guide
- Common Mistakes to Avoid
- What to Do If You Fall
- Track Your Progress
- Frequently Asked Questions
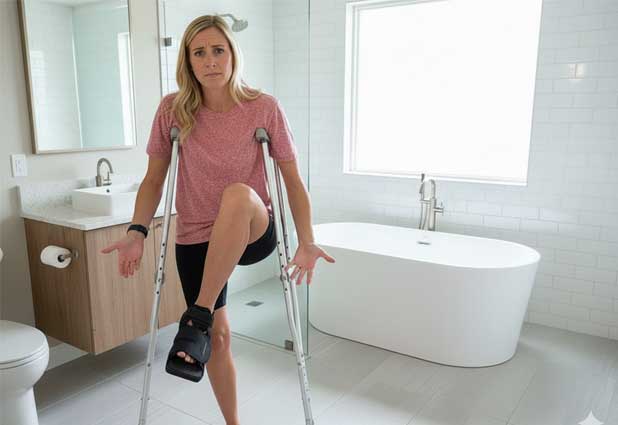
Standing in your bathroom on crutches, staring at wet tile and a narrow tub, wondering how to shower while on crutches without falling - that was me three days after ankle surgery. One wrong move and I'd be back in the ER. The fear is real.
I tested different setups over four weeks in two bathrooms: a cramped tub-shower combo with smooth tile and a walk-in shower with textured flooring. I used a shower chair, non-slip mats, grab bars, and a handheld shower head. Some days I was fully non-weight bearing. Other days I could put partial weight on my injured leg.
Here's the truth: there is a safe routine. It takes setup, patience, and respect for your limits. Sitting beats standing. Three points of contact beat one. Slow beats fast. This guide shows you exactly how.
Editor's note
Everything here was tested in two real bathrooms with both dry runs and wet transfers. When in doubt, sit, slow down, and keep one hand on a stable surface.
Quick Summary
Essential Equipment
Shower chair, non-slip mat, grab bar (or suction handle), handheld shower head, and waterproof cast cover if needed.
Safest Method
Sit on a shower chair instead of standing. Use three points of contact during transfers: grab bar, chair, and good leg.
Common Setup Time
First showers take 20-25 minutes. By week 2, you'll be down to 15 minutes as the routine becomes automatic.
Solo Showering
Keep phone nearby, text someone before/after, practice transfers dry first, and never lock the bathroom door.
Bottom Line
The safest shower setup uses a chair, non-slip mat, and grab bars for stability. Practice your transfers dry before adding water, and always keep at least one hand on something stable during wet transfers.
Key Takeaways
- Safest setup for most people: Shower chair with non-slip mat, grab bar within arm's reach, and crutches parked 2-3 feet away but still reachable without twisting.
- Sit, don't stand: Standing in the shower on crutches on wet tile is risky unless you have full weight-bearing clearance, excellent balance, and grab bars on both sides.
- Must-have gear: Non-slip mat under your feet and chair legs, at least one grab bar mounted to studs, and a handheld shower head so you control water direction without reaching.
- Showering alone: Keep your phone on the bathroom counter, text someone before and after, and practice transfers dry before adding water. Never lock the door.
How I Tested This Routine
I ran 12 trial showers across two bathrooms to figure out what works and what feels scary.
Bathrooms tested:
- Tub-shower combo with smooth porcelain tile, 16-inch step-over threshold, grab bar on left wall
- Walk-in shower with textured tile floor, 2-inch threshold, dual grab bars
Equipment tested:
- Shower chairs with back support (17-inch and 19-inch heights)
- Non-slip mats (textured rubber vs suction-cup style)
- Grab bars (permanent mount vs suction handles)
- Handheld shower heads with 5-foot hoses
- Waterproof cast covers for non-weight bearing days
Weight-bearing levels tested:
- Fully non-weight bearing (weeks 1-3 post-surgery)
- Partial weight bearing (weeks 4-6, up to 50% body weight)
- Full weight bearing with discomfort (week 7 onward)
Scoring criteria:
- Stability: How secure transfers felt, how much the chair moved when I shifted weight
- Ease of transfers: How many hands I needed, how long it took to get in and out safely
- Floor wetness: How much water escaped the shower area and made the floor slippery
- Fatigue: How tired my arms and good leg felt after a 15-minute shower
By trial eight, the routine felt automatic. Before that, every step felt like a puzzle. The key was slowing down and accepting that showers now take 20 minutes instead of 5.
Testing Results Summary
Step-by-Step: How to Shower While on Crutches
Follow these phases in order. Don't skip the dry practice. Your first real shower should not be your first attempt at transfers.
Phase 1: Prep the Bathroom Before You Step In
Do this while the floor is still dry and you have full stability on your crutches.
- Lay towels. Put one bath towel on the floor just outside the shower exit. This catches drips and gives you a dry surface to step onto. Place a second towel within arm's reach of where you'll sit in the shower.
- Check mat grip. Press down on each corner of your non-slip mat with your hand. It should not slide. If it moves at all, it will slide under your weight. Adjust it or get a better mat.
- Move clutter away. Remove shampoo bottles, razors, soap dishes, and anything else that could fall or create a slipping hazard. Keep only what you need for this shower.
- Set up toiletries. Place soap, shampoo, and conditioner on a caddy or shelf that you can reach without twisting your torso or standing up from the chair.
- Position your towel. Drape a dry towel over the grab bar or shower door so you can reach it while still seated after you turn off the water.
Never place shampoo or soap on the tub edge or floor where it can spill. Wet soap on tile is like ice. I learned this the hard way when a body wash bottle tipped and I almost planted my crutch tip in the puddle.
Phase 2: Set Up Your Crutches and Chair Safely
Chair placement:
- Position the shower chair 6-8 inches from the wall with the grab bar. This gives you room to reach the bar without twisting but keeps you close enough for support.
- Make sure all four chair legs sit flat on the non-slip mat. If one leg is off the mat edge, the chair will wobble when you shift weight.
- Test the chair by pressing down on the seat with your hand. It should feel rock solid. If it slides even slightly, adjust the mat or reposition the chair.
Crutch parking:
- Lean your crutches against the bathroom counter or wall, 2-3 feet from the shower entrance but still within reach when you extend your arm from a seated position just outside the shower.
- Do NOT lean crutches against the shower door, curtain rod, or anything that can move. I tried this once and the crutch fell into the shower while I was mid-transfer. Not fun.
- Make sure the crutch tips face away from the wet zone. Wet rubber tips are slippery on tile.
Phase 3: Getting Into the Shower on Crutches
This is the riskiest phase. Move slowly. Use three points of contact whenever possible.
For Walk-In Showers (Low or No Threshold)
- Position yourself. Stand on your crutches directly in front of the shower chair, facing the chair seat. Your good foot should be about 12 inches from the threshold.
- Grab the bar. Place one hand firmly on the grab bar. Keep your other hand on the crutch under your opposite armpit for balance.
- Pivot toward the chair. Shift your weight to your good leg, remove the crutch from the hand that's now on the grab bar, and turn your body 90 degrees so your side faces the chair.
- Lower to the chair. Keep one hand on the grab bar and one hand on the far edge of the chair seat (or the opposite wall if you can reach). Slowly bend your good leg and lower your butt to the chair seat.
- Swing your injured leg over. Once seated, lift your injured leg over the low threshold and place your foot on the non-slip mat inside the shower. Scoot back on the chair until you're centered.
- Position both feet. Place your good foot flat on the mat. Your injured foot can rest lightly on the mat or stay elevated if you're fully non-weight bearing.
For Tub-Shower Combos (High Threshold)
- Sit on the tub edge first. Position yourself parallel to the tub with your back toward the tub wall. The tub edge should be behind your thighs, just above your knees.
- Lower to the tub edge. Place one hand on the grab bar inside the tub and one hand on the tub rim or bathroom counter. Bend your good leg and lower yourself to sit on the tub edge. Your legs are still outside the tub.
- Swing your good leg in. Pivot your torso toward the inside of the tub. Lift your good leg over the tub wall and place your foot on the non-slip mat.
- Transfer to the chair. With one hand on the grab bar and one hand on the chair or far tub wall, shift your weight to your good foot and lower your butt onto the chair seat.
- Bring your injured leg in. Carefully lift your injured leg over the tub wall and rest it on the mat or keep it elevated. Adjust your position until you feel stable.
Do not try to step over the tub threshold while standing on crutches. Even with grab bars, one wet crutch tip or a moment of lost balance and you're going down hard. Always sit on the tub edge first, then transfer your legs one at a time.
Phase 4: Showering While Seated or Standing Carefully
Seated showering (recommended):
- Turn on the water slowly. Adjust temperature with the handheld shower head pointing away from you. Once the temperature is right, bring the spray toward your body gradually.
- Keep one hand free. Use the handheld shower head in one hand. Your other hand should rest on the grab bar, the tub wall, or your thigh for stability. Never let go of all contact points.
- Work top to bottom. Wet your hair first, apply shampoo, rinse. Then wash your body starting with your upper body and working down. This keeps soap from dripping into your eyes while you reach for your legs.
- Elevate your injured leg if needed. If you're fully non-weight bearing and using a waterproof cast cover, rest your injured leg on the opposite edge of the tub or a small stool to keep it out of the direct spray. Even waterproof covers can leak if submerged.
- Don't rush. Take your time. If you feel unstable or your good leg starts to cramp from holding your weight, pause and rest. The water can run while you catch your breath.
Standing in the shower (only if cleared by your doctor):
I only attempted standing showers during week 7 when I had full weight-bearing clearance. Even then, it felt risky.
- Requirements for standing: Full weight bearing approved by your provider, excellent balance without crutches for at least 30 seconds, grab bars on two sides of the shower, non-slip mat under your feet, and someone nearby in case you need help.
- Technique: Keep both hands on grab bars at all times unless you're actively washing. Shift your weight slowly. Never hop or pivot on wet tile.
- Honest assessment: Even with all the right conditions, standing felt unstable. My arms got tired from gripping the bars. Sitting is safer and less exhausting.
During non-weight bearing, I kept my injured leg elevated on a stool and relied 100% on my good leg and arms for transfers. Once I could bear partial weight (around week 5), I could plant my injured foot lightly on the mat for balance, which made transfers feel much more stable. The difference was huge. Partial weight bearing cut my shower time from 25 minutes to 15 minutes because I didn't have to move as cautiously.
Phase 5: Rinsing, Drying, and Getting Out
- Rinse thoroughly. Make sure all soap and shampoo are off your body before you turn off the water. Soap on your skin makes you slippery when you try to dry off.
- Turn off the water. Use the handheld shower head controls or reach for the main valve carefully while keeping one hand on the grab bar.
- Dry off while seated. Grab the towel you draped over the grab bar earlier. Dry your upper body, arms, and head first. Then dry your good leg. Save your injured leg for last - it's usually the driest since it's been elevated.
- Stand slowly. Place both hands on stable surfaces - grab bar, chair armrest, or tub wall. Push down with your arms and rise to a standing position. Take a moment to make sure you feel balanced before moving.
- Step out with your good leg first. For tub-shower combos, reverse the entry process: sit on the tub edge, swing your good leg out, then bring your injured leg over. For walk-in showers, step over the threshold with your good foot while holding the grab bar.
- Retrieve your crutches. Once you're standing on the dry bathroom floor, reach for your crutches. Get them positioned under your arms before you take any steps. Never try to walk or hop without them.
After my first successful shower using this routine, I sat on my bed for 10 minutes just catching my breath. My arms were sore, my good leg was tired, but I felt clean and I hadn't fallen. That's a win.
Watch the Step-by-Step Shower Routine
Seeing the transfers in motion helps more than reading descriptions. This demonstration shows the full routine from setup to exit.
Note: This video is a demonstration only and not a substitute for medical advice from your doctor or physical therapist. Always follow your provider's weight-bearing restrictions and transfer instructions.
Safe Bathroom Setup Checklist
Get your bathroom right before your first shower. These details matter.
Shower Safety Checks
- Non-slip mat: Textured rubber mat covers the full area where your feet and chair legs will be. Suction cups on the bottom are engaged. Mat does not slide when you push it with your hand.
- Shower chair height: When seated, your knees are level with or slightly below your hips. Your good foot can rest flat on the mat without your leg fully extended. Chair back is 2-3 inches from the wall with the grab bar.
- Grab bar position: Mounted to wall studs (not drywall anchors), positioned 33-36 inches from the floor, within easy reach when you're seated on the chair. If you can't install a permanent bar, use a high-quality suction handle rated for 250+ pounds.
- Toiletries and towel: All items you need during the shower are within arm's reach from your seated position. You should not have to twist your torso, stand, or reach across your body to grab anything.
- Phone or alert device: If you live alone, keep your phone on the bathroom counter (not in the shower where it can get wet). Unlock it before you start so you can call for help if needed. Consider texting a friend before and after your shower as a safety check-in.
Safety Setup Table
This table breaks down recommended setups for different bathroom types.
| Bathroom Type | Aids Used | Points of Contact | Main Risk Reduced | Notes |
|---|---|---|---|---|
| Tub-Shower Combo (Smooth Tile) | Shower chair, non-slip mat, 1 grab bar, handheld shower head | 3 (seat, good foot, hand on grab bar) | Slipping on wet porcelain during entry/exit | Sit on tub edge first, never step over threshold standing |
| Walk-In Shower (Low Threshold) | Shower chair, non-slip mat, 1-2 grab bars, handheld shower head | 3 (seat, good foot, hand on grab bar or wall) | Loss of balance during transfer over low curb | Easier than tub combo; still requires seated transfers |
| Walk-In Shower (Textured Tile, No Threshold) | Shower chair or bench, grab bar, handheld shower head | 3 (seat, both feet if partial weight bearing allowed) | Fatigue from standing too long | Best setup; nearly level entry makes transfers safest |
| Tub-Shower (No Grab Bar Available) | Shower chair, non-slip mat, suction handle (250+ lb rated), handheld shower head | 3 (seat, good foot, hand on suction handle) | Suction handle failure mid-transfer | Test suction handle daily; mount on smooth tile only; not as safe as permanent bar |
Gear Guide: What Helps You Shower Safely
You don't need expensive equipment, but you do need stable, well-designed basics. Here's what worked for me and what to look for when you shop.
Shower Chairs or Benches
What to look for:
- Adjustable height legs (most models adjust from 16-21 inches)
- Non-slip rubber tips on all four legs
- Backrest for upper body support (optional but helpful for longer showers)
- Weight capacity of at least 300 pounds (even if you weigh less, higher capacity means sturdier construction)
- Drainage holes in the seat to prevent water pooling
Height guide: When seated, your thighs should be parallel to the floor or angled slightly downward. Your good foot should rest flat on the mat without your knee hyperextending.
What I tested: I used a 17-inch chair for the first 3 weeks and upgraded to a 19-inch model in week 4. The taller chair made transfers easier because I didn't have to lower myself as far. For reference, I'm 5'9" tall.
$25-$60Non-Slip Mats
What to look for:
- Textured surface on top for foot grip
- Suction cups on the bottom (at least 50-100 cups for a standard mat)
- Size large enough to fit under the chair and both your feet (minimum 20 x 20 inches)
- Mildew-resistant material (usually PVC or rubber)
Placement tip: Press the mat down firmly starting from the center and working outward to engage all suction cups. Test it every few days - suction weakens over time, especially if soap residue builds up underneath.
What I learned: Textured mats grip better than smooth ones. I tried a smooth mat the first week and my foot slid slightly when I shifted weight. The textured mat felt rock solid.
$12-$25Handheld Shower Heads
What to look for:
- Flexible hose at least 5 feet long (6 feet is better for seated showering)
- Adjustable spray settings (a gentler spray is easier to control when seated)
- Easy-grip handle (textured or rubberized surface)
- Pause button so you can stop the spray without reaching for the main valve
Why it matters: A handheld shower head lets you direct water exactly where you need it without twisting or reaching. It's the difference between a safe shower and a risky one.
Installation note: Most handheld models replace your existing shower head in under 10 minutes with no tools. Unscrew the old head, screw on the new hose attachment, done.
$20-$50Grab Bars vs Suction Handles
Permanent grab bars (best option):
- Mounted directly to wall studs with screws
- Rated for 300-500 pounds
- Position 33-36 inches from floor, horizontal orientation
- Never rely on towel bars - they're not load-bearing and will rip out of the wall
Suction grab handles (temporary option):
- Only use models rated for 250+ pounds
- Must attach to smooth, non-porous tile (won't stick to textured surfaces)
- Test daily by pulling hard before you rely on it
- Replace every 6-12 months or sooner if suction weakens
Honest assessment: Permanent bars feel 10x more secure. Suction handles work in a pinch, but I tested one and it felt slightly spongy under my full weight. If you're renting and can't install a permanent bar, suction handles are acceptable, but test them obsessively.
Permanent: $15-$40 | Suction: $20-$35Waterproof Cast Covers
What to look for:
- Rubber diaphragm seal at the top (creates a watertight barrier around your leg)
- Correct size for your leg length and circumference (measure before ordering)
- Reusable design (one cover should last your entire recovery)
- Easy to put on and remove without assistance
Popular brands: DryPro, TKWC, and Bloccs are all well-reviewed. I used a DryPro cover and it kept my cast completely dry through 15 showers.
Application tip: Roll the cover up your leg like a sock, then stretch the rubber seal over your thigh or calf (depending on cover length). Pull it tight so there's no gap. Test it over the sink with running water before you trust it in the shower.
$15-$30Common Mistakes to Avoid
I made some of these mistakes during testing so you don't have to. Learn from my near-slips.
Trying to Stand in the Shower on Day One
I attempted a standing shower on day 4 post-surgery because I felt "pretty stable" on my crutches. Wrong. The wet tile plus fatigue from holding my weight on one leg made me wobble. I grabbed the grab bar hard and sat down fast. Sitting from the start is not about being weak - it's about being smart.
Hopping on Wet Tile
During an early transfer, I hopped one step on my good leg while my hands weren't on anything stable. My foot slipped about 2 inches. I caught myself, but it scared me enough to never do it again. Always have at least one hand on a grab bar or wall. No exceptions.
Rushing Because the Water Felt Too Hot or Too Cold
Adjust the temperature BEFORE you sit down. Once, I sat down, turned on the water, and it came out ice cold. I instinctively jerked away and almost lost my balance. Now I always test the temp with the handheld sprayer pointed away from me first.
Not Checking the Mat After the First Few Showers
By shower 5, I noticed my mat sliding slightly during transfers. Soap scum had built up under the suction cups. I lifted the mat, rinsed it, and pressed it back down. Problem solved. Check your mat every 3-4 showers or after using a new soap.
Forgetting to Dry the Floor Outside the Shower
Water drips everywhere during transfers. After my first shower, I stepped out onto wet tile without my crutches in hand and slipped forward. I caught the counter, but it was close. Now I always lay a towel right outside the shower door and dry off as much as possible before standing.
What to Do If You Fall
Immediate Actions
- Don't panic. Take a deep breath. Assess if you're hurt before you try to move.
- Check for injuries. Can you move all your limbs? Any sharp pain? Any bleeding?
- Turn off the water if it's still running and you can reach the controls safely.
- Call for help. Use your phone (that's why it's on the counter). Call 911 if you're injured, or call a family member/friend if you just need assistance getting up.
- Stay warm. If you're waiting for help, try to cover yourself with a towel to prevent getting cold.
- Don't try to get up alone if you feel dizzy, hurt, or unstable. Wait for help.
How to Get Up Safely (If Not Injured)
- Crawl to something stable. If you can, crawl to the toilet, tub edge, or a sturdy counter. Don't try to stand in the middle of the wet floor.
- Get on your good knee. Use your arms to push yourself up onto your good (uninjured) knee. Keep your injured leg extended.
- Use the stable surface. Place both hands on the toilet, tub edge, or counter. Push down with your arms and good leg to stand.
- Get your crutches. Once standing and stable, carefully retrieve your crutches before taking any steps.
- Dry off and rest. Get out of the bathroom, dry off completely, and sit down for at least 10-15 minutes before moving around.
Prevention Checklist (Review Before Each Shower)
- Non-slip mat is secure and all suction cups are engaged
- Shower chair is stable and doesn't wobble when pressed
- Grab bar is within reach and secure
- Floor outside shower is dry with towel in place
- Phone is on counter, unlocked, and within reach
- Someone knows you're showering (text before/after)
- Bathroom door is unlocked
- Crutches are parked in a stable location
Track Your Shower Confidence Progress
Recovery is a journey. Tracking your progress helps you see improvement week by week and builds confidence as you master the routine.
Week-by-Week Confidence Builder
Skills Mastery Checklist
Mark each skill as you master it. Don't rush - some take longer than others.
- Can position shower chair and mat correctly without help
- Can perform dry transfers smoothly in under 30 seconds
- Can transfer into shower without feeling unstable
- Can wash entire body while seated without standing
- Can control handheld shower head with one hand while maintaining balance
- Can dry off while seated before standing
- Can transfer out of shower safely when wet and tired
- Comfortable showering alone with phone nearby
- Can complete full shower in under 20 minutes
- No longer feel anxious before shower time
Free Downloadable Resources
Print these checklists and guides to keep in your bathroom as quick references.
Pre-Shower Safety Checklist
Laminate and hang in your bathroom. Check each item before every shower.
Download PDFEmergency Contact Card
Print and place on bathroom counter. Quick access to important phone numbers.
Download PDFWeekly Progress Tracker
Track your shower confidence and time improvements week by week.
Download PDFFrequently Asked Questions
Yes, you can shower safely on crutches by sitting on a shower chair, using a non-slip mat, installing grab bars, and keeping at least one hand on a stable surface at all times. The key is to sit rather than stand, set up your bathroom properly before you start, and never rush on wet surfaces.
Sitting is safer. A shower chair gives you three stable contact points (both feet and your seat) instead of balancing on one leg with wet crutch tips on slippery tile. Standing in the shower on crutches is risky and only appropriate if your doctor cleared full weight bearing and you have excellent balance.
Use a waterproof cast cover that seals above your knee or ankle with a rubber diaphragm ring. Popular brands like DryPro or TKWC cost $15-30. Make sure the seal is tight before turning on water. Even with a cover, keep your leg elevated on the tub edge or a stool whenever possible to avoid accidental splashes.
Sit on the tub edge first with your back to the tub wall. Place one hand on a grab bar or the far wall and one hand on the tub rim. Lower yourself onto a shower chair inside the tub, then carefully swing your injured leg over the tub wall. Never step over the tub threshold while standing on crutches.
Keep your phone on the bathroom counter within reach, text someone before you start and after you finish, install grab bars and a shower chair, practice your transfer dry before adding water, and never lock the bathroom door. If you feel too unsteady, ask someone to stay nearby the first few times.
Final Thoughts
Showering on crutches doesn't have to be terrifying. With the right setup - shower chair, non-slip mat, grab bars, and a handheld shower head - you can bathe safely and independently. The first few showers will feel slow and awkward. By week two, the routine becomes automatic.
Prioritize sitting over standing, keep at least one hand on something stable at all times, and never rush on wet tile. Test your setup dry before you add water. And if something feels unsafe, stop and adjust. Your safety is more important than your schedule.
You've got this. Take it slow, stay patient, and remember: clean beats fast every time.
Looking for more recovery tips and guides? Browse all blog posts →